
Parish Labs Specimen Processing Protocol
1. Phlebotomist will draw in initial tubes specific for the tests ordered.
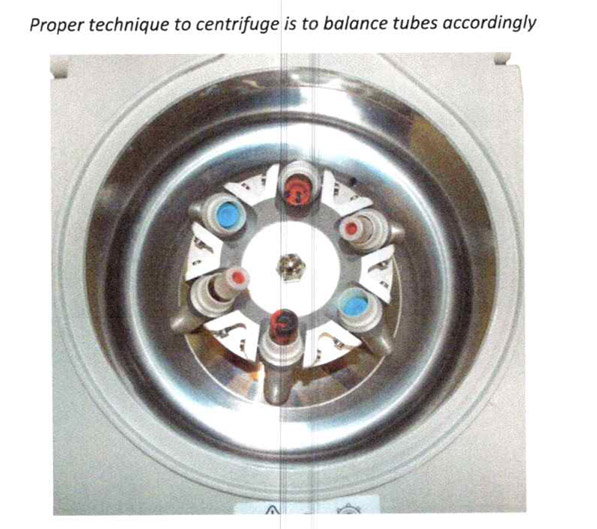
2. If serum and plasma are the specimens of choice for the test ordered, centrifuging the test tubes is necessary for separating the serum/plasma from the red blood cells. SST tubes must sit to clot(20 – 30 minutes) before
centrifuging.
3. Centrifuge the tubes for proper separation of red cells and serum/plasma, proper time for centrifugation is automatically programmed in the centrifuge.
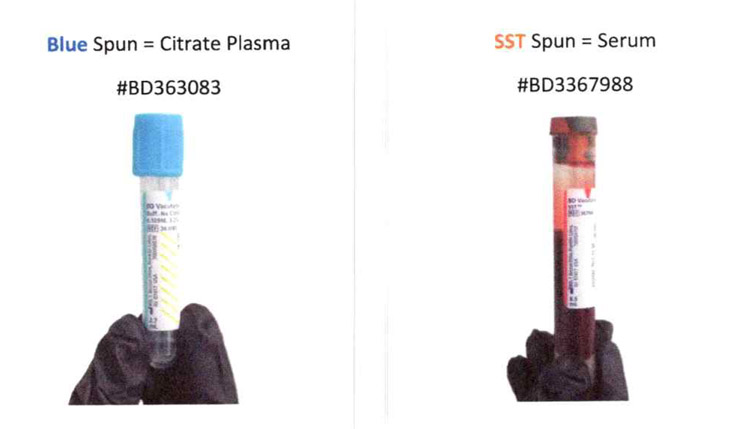
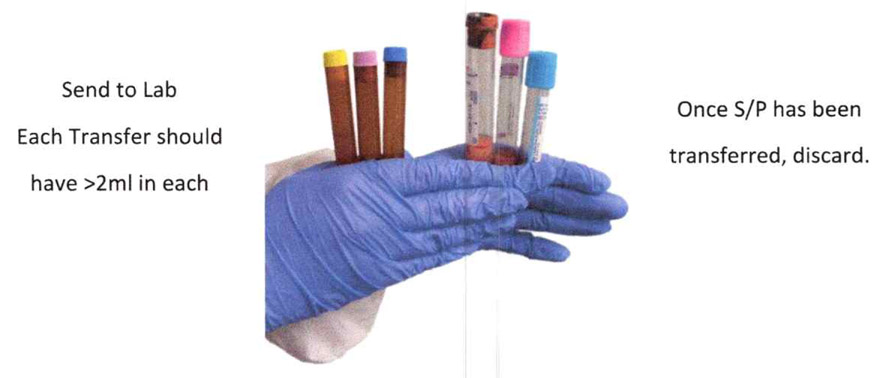
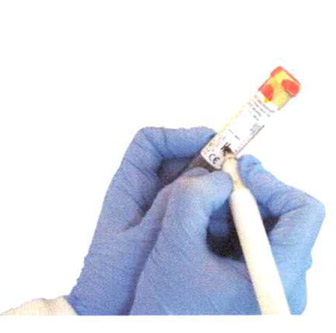
4. Transfer the plasma/serum with a transfer pipette into the amber transfer tubes. Label the tube with the color coded label indicating the appropriate pour off.
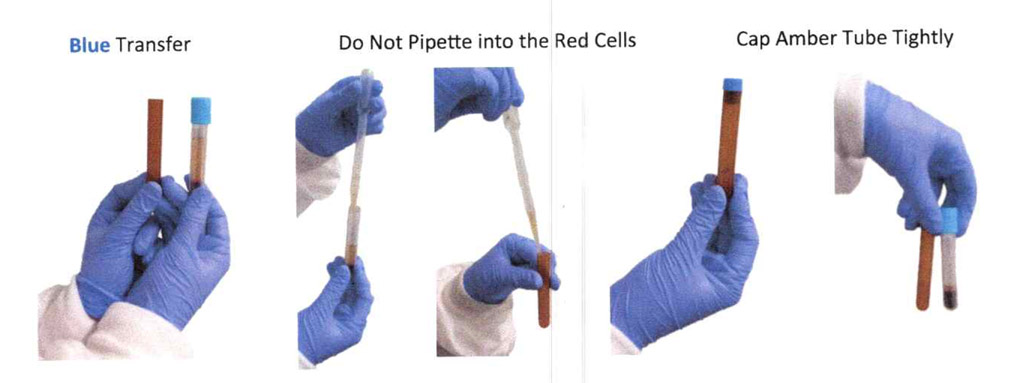
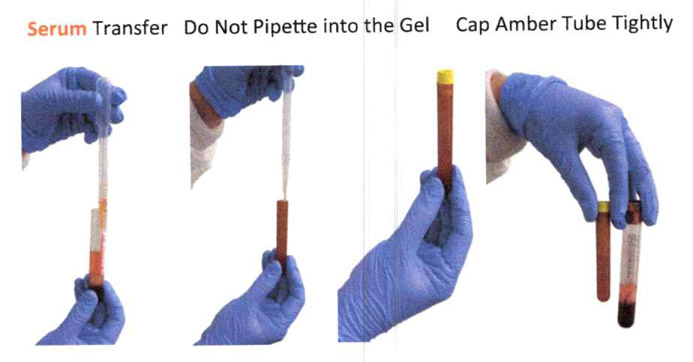
5. Discard the initial vacutainer tubes and send the correctly labeled transfer tubes. Please note to wite S for serum and P for plasma on the amber tubes so the lab can distinguise the tubes for specific testing.
6. If Specimen of choice for a test eg. CBC, A1C, send the initial draw of the lavender tube to the lab. DO NOT centrifuge or prcess it it a transfer tube. It wil be rejected. If specimen is ESR (Sed rate), Draw like an additional EDTA tube up to fill line.
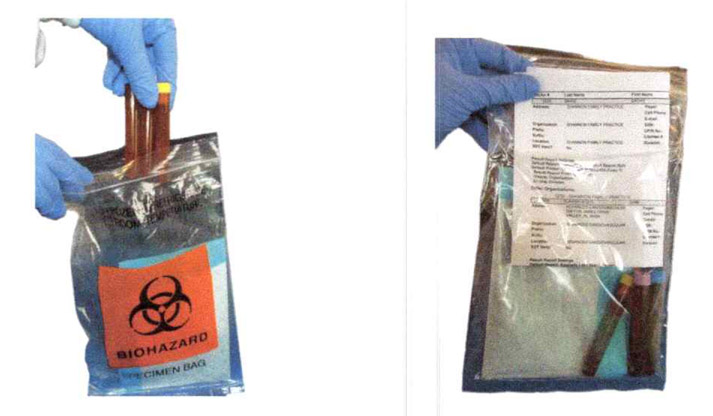
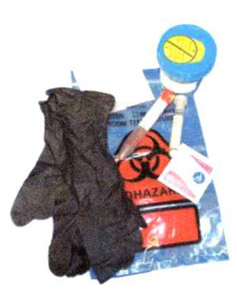
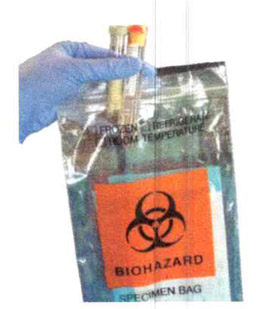
7. The properly labeled specimens and the completed requisition with insurance card copy and patient demographics must accompany the specimens in a biohazard two puch ziplock bag, specimens in the sealed side and the paperwork in the outer puch of the bag.
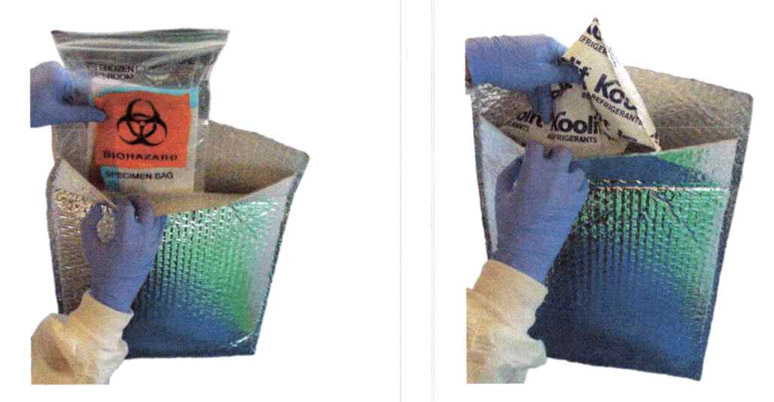
8. Put up to 10 individual bags in the silver refrigerator bag with 1 ice pack.
9. Specimens must be sent FedEx overnight.
The Proper FedEx Packaging for Shipment

1. Place speciments in a plastic sealable FedEx Shipment Bag; add ice pack for each overnight shipment. This will keep the specimens at refrigerated temparature of 40C – 80C while in transit.
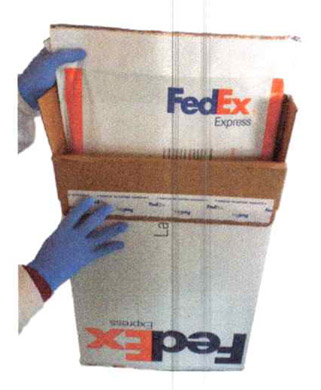
2. Place the sealed plastic FedEx bag in the large card board FedEx box, seal the box and affix the overnight packaging lable on the outside of the box.
3. FedEx will be scheduled to pick up daily from your clinic at a time of your convenience.
Specimens to Lab
1. Specimens will be received next day at the lab.
2. Lab will inspect and process the speciments as soon as received.
Specimens will be rejected by lab and called to the clinic for recollect
Reasons for rejection:
– Specimens receoved at improper temperature
– Specimens are not labeled properly.(No Nicknames of patient)
– Specimens are hemolyzed.
– Sample not closed properly/leakage.
– Quantity not sufficient (QNS) – Urine Drug Screens require 10ml transfer tubes (recommened 2-10ml transfer tubes); Must refer to the Directory of Service for the proper volume for each blood test ordered.
– No diagnosis codes
– Name and information on the tests do not match the requisition.
Final Results Reported to Provider Via:
1. Email
2. Fax
3. Web Portal
Processing Urinalysis Samples
UA Preservative or Plain UA Tube and Culture & Sensitivity (C&S) Preservation Tube
1. Open Urine Collection Kit.
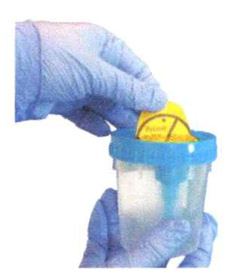
2. Peel back protective sticker to expose rubber-covered cannula
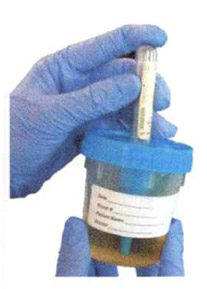
3. a. Push C&S preservative Tube(gray top) into the inegrated transfer port.
b. Hold position until flow stops.
c. Remove tube.
d. Shake vigorously.
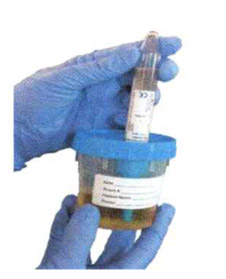
4. a. Push UA Preservation Tube (cherry red/yellow top) or plain UA Tube (yellow top) into integrated transfer port.
b. Hold position until flow stops.
c. Remove tube.
d. Invert UA preservative Tube 8-10 times to mix sample.
5. a. Place protective sticker back over the integrated transfer port.
b. Label both filled tubes with patient’s name, the date/time of collection and any other date required by your institution.
6. Place both labeled tubes into sample zip lock bag.
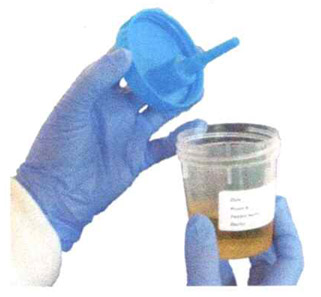
7. a. remove lid from cup and dispose in a sharps collector.
b. Dispose of urine according to your facility’s policy.
c. Dispose of collection cup as biohazard.
Processing Urinalysis Samples
Processing Urine Toxicology Samples
1. Open Urine Collection Kit.
2. Peel back protective sticker to expose rubber-covered cannula
3. a. Push urine collection tubes (yellow tops) into integrated transfer port.
b. Hold postion until flow stops.
c. Remove Tube.
d. Invert tube 8-10 times to mix the sample.
4. a. Place protective sticker back over the integrated transfer port.
b. Label both filled tubes with patient’s name, the date/time of collection and any other date required by your institution.
5. Place both labeled tubes into sample ziplock bag.
6. a. Remove lid from cup and dispose in a sharps collector.
b. Dispose of urine according to your facility’s policy.
c. Dispose of collection cup as biohazard.